Monday, January 28, 2008

Steady Shots from the Comfort of Your Car


Not everyone is John Muir, roaming the wilds with just a walking stick and a broad-rimmed hat. Some folks would rather shoot without leaving the comfort of their automobile.

Sometimes, you're not allowed out of your car, such as when you're visiting certain wild game preserves or protected wildlife areas. Other times, you can use your vehicle as a duck blind of sorts. Animals seem less concerned about people when they are safely strapped inside an automobile. And then there are those days when you just don't feel like taking a hike.

Regardless of the situation, you want sharp images from your day's outing. And the best way to keep things nice and crisp is to steady the camera during exposure. But in a car, that's easier said than done. It's not like you can set up your tripod on the front seat.

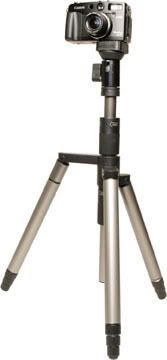
But what you can do is use the car itself as a stabilizer. Roll down the window about 2/3 of the way and attach a Bogen Car Window Pod (catalog #3292) with a Junior Tripod Style Head (catalog #3407). You can find out more about these at http://www.bogenimaging.com. The combination sells for about US$85, and they are well made and extremely sturdy.

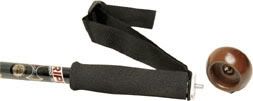
If $85 is a little more serious than you care to get for your front-seat shooting, take a look at Pedco's UltraClamp (US$29.95) with UltraMount (US$10.95). If you really need to go on the cheap, try the Pillow Pod Beanbag, available for about US$6 from Porter's Camera Store (http://www.porterscamerastore.com). Photo beanbags are great accessories to keep in the trunk because you can use them in so many situations. The bag conforms to the surface on which its placed, providing a steady support for your camera while protecting it from the surface itself. You can plop it over the edge of a car window, on a tree limb, or even on the ledge of a balcony, and it will help you take sharper shots.

Here's one word of advice: be sure to keep the camera strap around your neck when you place your expensive investment on the edge of anything. One false move and both camera and beanbag might go tumbling to their doom. You'll get over the loss of the beanbag pretty quickly. Recovering from a shattered camera might take a little longer.

Thursday, January 24, 2008

Walking-Stick Mount


A trusty walking stick is helpful for fording streams and navigating slippery trails. But why not use it to steady your camera, as well as your footing?

In the wide world of walking sticks, there are basically two types: the ones you buy and the ones you make. Either version can become a steadying friend for your outdoor photography.

A trip to the mountaineering store reveals that today's walking sticks—or trekking poles as those in the know call them—are lightweight, sturdy, and have comfortable grips. Most are constructed in collapsible sections, enabling the stick to fit nicely in a suitcase or be lashed onto the outside of your backpack. Most trekking poles have a rubber tip that provides good traction on paved walkways and a metal tip for digging into the side of hills.

Leki (http://www.leki.com) is a popular supplier of trekking poles that range from US$50 to over US$100. Outdoor photographers should take a look at the Sierra Antishock (model TK2091-04), which has a removable wooden knob that exposes a camera mount.

By attaching your camera to the walking stick, you can create the third leg of what I call the human tripod. You supply your two legs, and the walking stick becomes the third. Simply position your feet about shoulder's width apart, and then lean forward slightly on the walking stick while composing your picture in the camera's viewfinder. You'll find that this method is much easier for stabilizing the camera than trying to hold it with just your two hands.

If you'd rather not spend the money on a Leki stick, you can make your own. First, make a quick trip to the hardware store for a 1/4" screw with 20 threads per inch. Get one about an inch or so long. Screw it into the tripod socket on the bottom of your camera. I recommend that you add a plastic washer to serve as a cushion between your camera and the walking stick. Slip the spacer on the screw and position it so that it's flush against the bottom of the camera. With a felt-tip pen, mark the screw right beneath the washer, and then remove both pieces from the camera.

Drill a hole that's slightly smaller in diameter than the 1/4" screw in the top of your walking stick, and then twist the screw into the hole so that the mark you made is just below the top surface. Be careful not to damage the threads while doing this.

Now, slip the plastic washer onto the post. It will serve as a cushion. Attach your walking stick to the tripod socket in the bottom of the camera. Do this with care the first time to ensure that you measured correctly, and don't damage the bottom of the camera by screwing the post too deep into the socket. If you miscalculated, sink the post further into the walking stick and try again. The post should fit snugly in the camera socket, but it shouldn't go too deep.

If you want to add a crowning touch, add a decorative knob to the top of the stick to cover the post when the camera isn't attached. You can drill a hole in the knob and sink in a 1/4" nut so that the knob easily screws on and off.

Regardless of whether you go the homemade route or opt for the slick Leki model, a walking stick that doubles as a camera stabilizer can help you take sharper pictures when you're in the great outdoors.

Tuesday, January 22, 2008

Travel Tripod: A Happy Compromise


When tabletop supports are just too small, but you can't afford to pack a full-size tripod, you might want to consider a travel model that folds flat and fits in the smallest of suitcases.

On my last trip to Europe, I knew that I wanted to photograph landscapes and other subjects that would require a tripod. But I needed to travel light, because I was taking only a midsize duffle and my camera bag to store all of my belongings. A key piece of equipment for this adventure turned out to be a unique travel tripod called the Magic 2, made by Cullmann.

Unlike other tripods that have a large circumference even when collapsed, the Cullmann's legs fold flat, forming a compact rectangle that is only 1.5 inches thick and 13.75 inches long. It fits almost anywhere. And even though it's constructed of anodized metal for durability, the Magic 2 weighs only 2.5 pounds.

You can extend this marvel of engineering to 57 inches, but I don't recommend it. Instead, resist extending the center post to maximum height and keep the tripod to about 50 inches for better stability. I also recommend you hang your camera bag over one of the legs or around the center post for a more stable shooting surface.

One of the reasons this unit is called Magic is that it also converts to a better-than-decent monopod. That's right, one of the legs detaches from the main unit and screws into the center post to create a walking stick with a ball-head mount on top. This is really nice for day hikes when you want to leave the rest of the unit back in the hotel room.

In online reviews, some photographers have remarked that the tripod legs don't spread wide enough to provide adequate stability on uneven surfaces. I agree. I had to be careful where I set up the Magic 2 and had
to remember to stabilize it with my camera bag.

The legs extend to full height via four collapsible sections. They twist one way to loosen and the other to tighten, which works well most of the time. An important tip to remember is not to tighten the legs when you collapse the tripod. You'll have a hard time getting a good grip to loosen them later. I think it's a law of nature that tripod legs get tighter on their own over time. Keep them loose except when extended.

The ball-head tripod mount that comes with the Magic 2 enables you to position the camera at just about any angle. It even has a quick-release plate, so you can easily detach and reattach the camera.

You can purchase the Cullmann Magic 2 from most photo retailers, including http://www.adorama.com or http://www.bhphoto.com, for about US$115. It's quite effective for most of today's digicams. Even though it's not perfect, I've recorded many fine images with it that I would have otherwise missed.

Monday, January 21, 2008

Pocket Tripods on the Go


Yes, your full-size tripod is important, but when you want to travel light, a pocket tripod is great for getting into your own group shots and capturing twilight landscapes.

For so many creative endeavors, you need a way to stabilize your camera; it comes with pushing the limits of photography. Every serious photographer needs to have a full-size tripod. But beyond that, a variety of smaller stabilizing devices can help you cope with various shooting situations. At the top of this list is the pocket tripod.

Before I get into the equipment itself, I want to review why tripods contribute so much to image sharpness. They help prevent camera shake: soft, fuzzy images that result from not holding the camera steady during exposure.

When you want to photograph a subject without a flash in low ambient light—such as when you're indoors, or during dusk or early morning hours—your camera chooses a long shutter speed. When I say long, I mean 1/8, 1/4, 1/2 of a second, or longer. Now, those times probably sound pretty fast to you. But in camera terms, they are as slow as molasses in winter. Most daylight pictures are recorded at 1/60, 1/125, 1/250 of a second, or faster.

Once your shutter slows down to 1/15 of a second or longer, you need to stabilize the camera. If you don't, the slightest movement you make during the exposure will actually cause softness in the image. In low lighting, even the act of pressing the shutter button itself can cause camera shake.

This is why tripods are necessary. Unless you're going to limit your shooting to broad daylight or flash photography, you're going to need a way to stabilize the camera. For big jobs, such as photographing a starry night, you'll need a big tripod. But for many situations, you can get by with a mini tripod that fits in your back pocket. These are important tools, because compact tripods are more likely to make the trip than their bulkier big brothers, who are often left at home.

The results of camera shake and poor focusing are different. With camera shake, the overall picture will look a tad fuzzy. When you focus poorly, something in the shot will be sharp, just not the part you wanted.

Let's look at a few pocket tripods and see what's available:


UltraPod II

Pedco (http://www.pedcopods.com) makes two sizes of their versatile UltraPod. I recommend the larger UltraPod II because it's the more stable of the two. These portable tripods include ball heads, and they fold up nicely to fit in your back pocket or camera bag. They are made from durable plastic that can handle abuse. They include a sturdy Velcro strap that enables you to secure the camera to signposts and tree limbs. This increases their usability greatly, because you don't always have to find a level surface. Most retailers sell the UltraPod II for US$29.


Sony VCT-TK1 Compact Pocket Tripod

This Sony camera support doesn't look like your normal tripod. It is extremely portable because it folds flat, but it's better designed for tabletops and other flat surfaces. It sells for only US$15 from retailers such as MainSeek.com (http://camera.mainseek.com).


Quantaray QT-75 Mini Tabletop Tripod

Quantaray's offering has three legs that spread a pretty good distance, providing stable support on flat surfaces. The screw-mount head allows for both vertical and horizontal tilting. This mount isn't as versatile as a ball head, but it's easier to level the camera quickly, increasing your odds for a straight horizon line. The QT-75 is available from retailers such as Digital Cameras4All (http://www.digital-cameras4all.com) for about US$15.

Regardless of which tripod you use, keep in mind that it's best to trip the camera's shutter by using the self-timer or the remote release. That way, you won't jar your digicam by pushing the shutter button directly.

Pocket tripods aren't perfect for every situation. But they are remarkably versatile and will enable you to capture many shots you would otherwise miss. And unlike their big brothers, they won't put a strain on your shoulder or your pocketbook.