Showing posts with label Photography. Show all posts

Tuesday, April 1, 2008

Make Your Own Passport Photo

Don't spend money for a terrible passport picture that you'll be embarrassed to show to strangers all over the world. You can take your own shot, and make great first impressions instead.

Why is it that whenever you have an official photograph taken, you're made to look like a criminal or terrorist? Sometimes, you don't have a choice in the matter, such as for your driver's license (or booking at the county jail). But when it comes to passport photos, you can submit your own picture, and I recommend you do.

There are general requirements for an acceptable photo:

  • Photographs must be identical and recent (within six months), with a clear full-face and front-view image. They may be in color or black and white.

  • The photographs must be at least 2" 2" (5cm 5cm), exclusive of any white borders. The image size, from the bottom of the chin to the top of the head (including hair), should measure between one inch and one and three-eighth's inches. There should be at least one half inch between the top of the head and the photograph's border.

  • There must be a clear contrast between the background and the image of the subject. The background of the photographs must be white. Grainy photographs cannot be accepted.

Easy enough, right? Now let's talk about actually taking the picture, because that's the important part. Here is the equipment you'll need:

  • Digital camera with a self-timer or remote release

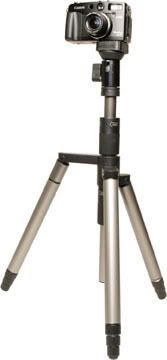
  • Tripod or alternative way to position the camera

  • Two pieces of white foamcore, cardboard, or some other sturdy, reflective surface

  • A stool or something else to sit on

  • Inkjet printer with photo paper, preferably with matte surface

You want to avoid that stark, deer-in-the-headlights appearance that's usually caused by using a single flash in a darkened room. You might still use a flash for your shot, but if so, it should be a fill flash and not the sole source of illumination.

Look for a well-lit area that has a white or light background. You might use a brightly lit room in the house (with lots of light coming through one or more windows) or an outdoor setting, where you can use the side of the house for the background. But you don't want the sun shining right in your eyes. Diffused light is better.

Position your sitting stool at least five feet away from the background. You don't want to record much background detail. Instead, you want the background a little out of focus, and distance is the best way to create that effect.

Put the camera on the tripod and point it at the sitting stool. A trick I like to do is to put a lamp on the stool to act as my model while I'm aligning the camera. If you have a helper for this project, that person can serve as your stand-in. Position the camera slightly above eye level of the subject. By doing so, the picture will be more flattering and, if you do use a fill light, the shadows will be cast downward and out of the picture.

For your first test shot, turn off the flash. Let's see how it looks with natural light only. Turn on the self-timer, have a seat, smile slightly, and hold still until the camera has recorded the image.

How does it look? If one side of your face is too shadowy, then position one of the pieces of white foamcore so it reflects light onto the dark side of your face. Try another exposure and make more adjustments to the reflectors until you get something you like.

Sometimes, you just can't get enough pop in the image if the room lighting is too flat. In this situation, turn on the fill flash function. If you camera has a control for flash exposure compensation, set it to -1. The goal here is not to have the flash serve as the main light source. Instead, you just want a little additional pop to augment the ambient lighting.

If you're taking your own photo, try positioning a mirror behind the camera to help you pose. Also, some digicams have swiveling LCD monitors. If you have one, turn the flip screen all the way around so you can see yourself in the monitor. It's a great time-saver!

Finally, once you get the exposure you want, take a look at the color balance. Is it too cool? Sometimes, in this type of lighting, the color tint tends to be on the bluish side, which isn't good for anyone's skin tones. To compensate, set the white balance to cloudy and try again. By now, you should have a pretty good-looking photograph. The picture shows a more flattering passport picture than I'd get from government photographers.

Upload your images to the computer and pick your favorite. Adjust the brightness and contrast to suit your taste, but don't get artsy. Remember, this has to be a clear, evenly lit image.

Once you have everything in order, make a duplicate of the picture by using the Save As command. Resize your copy so that it's slightly bigger than a 2" 2" or 5cm 5cm square, and print out two copies on your printer. I think that matte surface photo paper looks better for this application.

Trim the photos to size, and head on down to the government office. You now have a passport that you can proudly show to strangers across the globe.

Wednesday, March 26, 2008

Secrets of Whiteboard Photography

Never rewrite anything you can digitize. If you've ever been tasked with copying a full whiteboard after an intense brainstorming session, you know what I mean.

You've just finished participating in one of the most amazing brainstorming sessions of your career. The massive whiteboard, which covers an entire wall of the conference room, is covered with words, arrows, and diagrams. You're about to rush from the room to begin putting these plans into action when your boss says to you, "Robertson! Would you please copy down these notes and circulate them to everyone who attended the meeting?"

Copy those notes?! Not even Leonardo Da Vinci could reproduce those drawings. Suddenly, an air of calm comes over you as you recall "Secrets of Whiteboard Photography" from Digital Photography Hacks. You pull your digital camera out from your backpack and go to work.

Why rewrite something that's already been written, when you can photograph it, save it as a .jpg file, and circulate it to anyone with a browser on their computer?

This hack will make more sense to you if you first understand how a camera sees the world. Most cameras are calibrated for capturing blue skies, green grass, and other middle tones. And, more often than not, your camera will try to convert anything on the extreme end of the exposure scale to those same middle tones. So the black cat becomes gray and the whiteboard becomes a murky beige color.

So, job number one is to find your exposure compensation adjustment and set it to +1. That will tell your camera to overexpose the subject and make the whiteboard white, not gray.

Then, turn up the room lights, open the shades, and turn off your camera's built-in flash. Those little strobes might be fine for blinding your best friend at her birthday party, but they're not so good for shooting whiteboards—unless, that is, you don't care about reading the writing. Flashes tend to nuke white shiny surfaces.

Now, take a test shot like the one shown in the picture. How do the colors look? Some cameras have excellent auto white balance settings and will compensate for most lighting situations. If the color looks off, you might want to override the auto setting.


Photobucket

If the lights in the room are fluorescent, look for the fluorescent setting on the white balance and try a test shot with that. Often, the adjustment will greatly improve the color balance. In addition to fluorescent, you also have a preset for tungsten bulbs. Use the one that best suits the lighting in the room.

Here is where the true art comes in: composing the shot. To avoid extreme distortion, where the whiteboard looks like a parallelogram from high school geometry, you must keep the plane of the camera parallel to the plane of the whiteboard. In most cases, this means nice and straight on the vertical axis (no tilting) and level on the horizontal axis (such as placing it on a table). This will minimize distortion and render the photo of the whiteboard closer to how it appeared during the meeting.

Most cameras, especially point-and-shoot models, produce some degree of barrel and pincushion distortion. So if your lines around the edges of the frame are a little bowed, don't think you are necessarily doing this hack wrong. Of course, you can always cheat a little and not show the frame of the whiteboard in your shots.

For large whiteboards, you might want to record the information in two or three shots so that it's readable on the computer screen and doesn't look like tiny tracks left by ants with dirty feet. You can zoom in on key concepts (and name the file accordingly later) or simply shoot the board in sections, moving from left to right. Use your judgment here.

If your shots look a little blurry, that's probably because the room lights aren't bright enough for a decent shutter speed and you're getting what's known as camera shake. Most of the time, you can solve this problem by increasing the ISO setting from 100 (the default on most digicams) to 400 or even 800. That will give you a faster shutter speed, which should result in sharper images.

Remember to return to the default ISO setting after shooting the whiteboard, or you'll be very disappointed with your next batch of landscape shots.

Now that you have the pictures in the camera, upload them to your computer and give each one a descriptive filename. You can send them as email attachments, but I find that rather inelegant. Instead, build a quick-and-dirty web page and post it on the company server. All you have to do now is send everyone the link. That way, they can look at the pages they want and use their browser's forward and back arrows to move from image to image.

Photographing whiteboards is a good option for occasional use, but if this becomes a daily task, you might want to investigate digital whiteboards that transfer the scribbling directly to a connected computer. Check out Smart Technologies (http://www.whiteboards-usa.com/smart/whiteboards/) for more information.


Monday, March 17, 2008

Get the Big Picture with a Panorama

They say two heads are better than one. When it comes to showing the "big picture," many heads—er, shots—are definitely bigger than one.

Many people are frustrated by their inability to capture the majesty of awesome natural monuments such as the Grand Canyon. I've heard this phrase a dozen times: "This picture doesn't really do it justice. It looked so fantastic when I was there."

Bad photography isn't the culprit here; inadequate coverage is.

Let me ask you this: if you went to the Grand Canyon and had to look at it through a toilet-paper tube, how impressive would you think it was? Probably not much. The same thing happens when you try to capture the magnificence of a vast location with single shots on your point and shoot. This doesn't mean that you have to go out and buy a camera with a superwide lens. Instead, put the magic of digital photography to work for you.

Almost every digital camera available today is capable of creating breathtaking panoramas by stitching together a series of shots into one gigantic, seamless scene. Back in the days of film, you probably played around with this technique by taping together snapshots to make a bigger picture. One of my favorite artists, David Hockney, put a creative spin on this technique with works such as "The Brooklyn Bridge Nov 28th 1982" and "Pearblossom Hwy." Hockney's works are usually referred to as photographic collages. But the concept is similar to our exploration here—taking a bunch of small images and combining them to make a big picture.

Unlike Hockney's work, however, our panoramas are very linear, moving from left to right. If your camera has a Panorama mode, use it; it helps you capture the images in a way that's easier for your computer to deal with later. That's the process. You shoot 3 to 12 pictures, moving from left to right, then upload them to your computer where they can be stitched together as a sweeping vista.

Let's start with the shooting technique. You'll get the best results if you use a tripod, and you'll have even better luck if you have a bubble level to go with it. That way, you can align your camera to keep a straight horizon line through the entire picture-taking sequence. If your tripod doesn't have a built-in level, go to the camera store to buy one that attaches to your camera's hot shoe.

Look for a location with the sun to your back. Most panoramas cover about 180°. You want the lighting as even as possible on that scene so that you don't have abrupt shifts in the color of the sky, which makes it more difficult to stitch together the scene and end up with continuous tones.

Once you have your camera mounted and aligned, swing through the scene and follow the horizon line to make sure it stays level.

If your camera has a Panorama mode, enable it. Otherwise, just make sure you overlap one third of the frame as you move from shot to shot. This will give your computer lots of information to stitch the scenes together.

Swing the camera to point in the direction of your left shoulder and shoot the first frame. Move the camera one frame to the right (remembering to overlap the scene by one third) and shoot again. Work all the way through the sequence until your capture the scene in the direction of your right shoulder.

Review your images on your camera's LCD monitor. If you like the way they look, you're finished. Otherwise, recompose and shoot the series again.

If you don't have a tripod with you, shooting a panorama is still possible. Put the strap around your neck and extend the camera until the strap is taunt. Align your first shot to the left and fire. Don't move the camera after the exposure. Instead move only your feet and align the next shot. Essentially you have turned yourself into a human tripod.

Pay close attention to the horizon line as you work through the sequence. You won't get the full height of the scene by using this method, because you're bound to misalign the camera slightly as you work through the series of shots. But you can crop the picture after stitching and still get an amazingly good panorama.

Here's an example of the technique in action. Standing on a balcony overlooking New York's Grand Central Station gives you an inspiring view. So why does the picture in Figure 2-6 look so uninspiring?

Now take a look at Figure 2-7. Ah, now that's better! By stitching six shots together from a Canon Digital Elph S-400, I was able to show how Grand Central really looks to my friends back home.

Cameras with a Panorama mode will label the pictures differently than your standard single shots, so you can easily identify them when you start working on the computer. The normal image file will look something like IMG_0001_JPG. But on Canon cameras, for example, panorama files should read something like this: STA_0006_JPG, STB_0007_JPG, STC_0008_JPG, and so on. You can look at these files and right away know which one was first in the series (STA), second (STB), and so on.

Once your pictures have been uploaded to your computer, you can either use the stitching software that came with your camera, or the Photomerge function in Photoshop Elements or Photoshop CS. Either way, the software will endeavor to stitch together the sequence of files into a continuous composition. The more careful you are when you record the scene, the more success you'll have when working on the computer.


Photobucket

Even if your camera doesn't have a Panorama mode, you can still use Photoshop to connect the shots. The pictures won't be labeled differently, so you'll have to preview them, figure out the order in which they were shot, and then move them into Photomerge. Photoshop will take it from there.


Photobucket

One of the great advantages of shooting panoramas is that your 3-megapixel camera suddenly becomes an 18-megapixel monster when you stitch together six 3-megapixel shots. You can make prints that are 3 feet wide instead of just a regular old single-frame 4" 6".

Many camera stores carry frames in panorama dimensions. You can print your final composition on 8.5" 11" inkjet paper, trim it, and display it in one of these frames. I guarantee that it will make a much more powerful impression than the original 4" 6" print that just didn't do the scene justice.

Sunday, March 16, 2008

Use Sunglasses as a Polarizing Filter

Chances are, you have a high-quality polarizing filter with you at all times, right under your nose. (Actually, it's sitting on your nose.)

Next to a fully charged battery and a huge memory card, a polarizing filter is the digital photographer's best friend. It reduces unsightly glare, deepens the richness of skies, and improves overall color saturation.

The problem for most shooters on the go is that they don't always have their full kit of accessories with them. And many point-and-shoot cameras don't even provide a way to attach an external filter, even if you wanted to.

So what's a photographer to do? Does this mean you'll have to suffer with glare-y subjects and desaturated skies, just because you want to tote a convenient digicam instead of lugging around an albatross of a camera bag?

Not at all. Your solution is sitting there right on top of your nose. Your sunglasses! Great lighting usually results in good photographs, with or without filtration, as shown in picture 1. But sometimes you want to enhance an already good lighting situation. Often, polarization is the perfect solution, as shown in picture 2. If you don't have a polarizing filter with you, try your sunglasses. You might be surprised by the results.

Without a sunglasses filter

Photobucket

With a sunglasses filter

Photobucket

Many quality shades are made out of the same material that camera polarizers are made out of. Simply take off your sunglasses and place one lens as close to your camera's shooting lens as possible. Then, take the shot. If you want to see the difference, take the same picture again without the sunglasses.

As with any good hack, there are ways to maximize the effect:

  • Stand with the sun at one shoulder. The polarizing effect is more pronounced when the sun is coming from the side.

  • Glasses with bigger lenses are much easier to use as filters than small-lens models. If you're shopping for a pair of photo shades, get a pair with decent-sized glass.

  • Stick with neutral tinted lenses. You can always adjust the color balance on your camera, but unless you want all of your shots to look like pop art, stay away from colored lenses.

  • Use sunglasses that actually say they produce polarizing effects. Many quality brands do.

So, next time you want to enhance that beautiful blue sky with lots of big puffy clouds, loan your sunglasses to your camera for a few frames, and marvel at the results

Tuesday, March 4, 2008

Capture Kids Without Going Crazy


Sure, kids are cute in real life. But when it comes to capturing them with your digital point-and-shoot camera, they can be as elusive as leprechauns.

Digital point and shoots are great general-use cameras. But most of them are plagued by a phenomenon called shutter lag: the response time from the moment you push the shutter button to when the picture is actually captured is too long, sometimes as long as a second. In kid photography, a second might as well be a week.

2.3.1 Choosing a DSLR Camera

This next section of this hack provides ways to increase your odds of success with point and shoots. But first, if you want to cut right over to the fast lane, consider getting a digital SLR (DSLR), which has a much faster response time and performs better overall. DSLRs look and behave just like your favorite 35mm single lens reflex (SLR) cameras of years past, but they have a sophisticated image sensor instead of film.

Not long ago, this wouldn't be practical advice for parents, because DSLRs were just too darned expensive. But you no longer have to choose between a camera and a college fund. Both Canon and Nikon have introduced quality DSLRs for under US$1,000, and more are sure to be on the way. The Canon Digital Rebel and the Nikon D70 are two examples of DSLRs that will help you keep up with your kids without maxing out your credit card.

DSLRs have minimal shutter lag times, allow for generous sequential shooting, accept a variety of lenses, and enable you to use external flash. In other words, they are perfect for action, er, kid photography.

2.3.2 Hacking the Point-and-Shoot Camera

Now that you know what your next camera should be, how do you get the most out of the one in your hand? OK, here are some tips to increase your odds of success.

First, get everyone outdoors, where there's more light, better backgrounds, and lots of things for kids to do. Then, make these three adjustments on your camera:


Set for the highest resolution your camera allows.

This enables you to later crop out part of the picture, yet still have enough pixel information to make a good-sized print. It's like adding a powerful telephoto lens to your little point and shoot.


Find Infinity Focus mode and activate it.

Essentially, this disables the autofocus (which is slow as mud on most consumer digicams) and lets you capture perfectly focused images from about eight feet to infinity. By doing so, you've just shortened the length of time from when you push the shutter button to when the image is recorded. This also allows you to hang back a few feet, so you're not spending all your energy chasing kids around instead of photographing them.


Enable Continuous Shooting mode.

Instead of taking a bunch of single shots and missing the action, Continuous Shooting mode lets you hold down the shutter button and fire a series of frames. The knack to this is starting the sequence right before the decisive moment and shooting through it. Then, review your pictures on the LCD screen, remove the obvious misses, and keep the winners.

Here are a few other things to keep in mind. Arrange your shoots for the time of day that your children feel the best. They will cooperate more and act less fussy. Remember to get down low, at their level, for the most intimate photographs. If you can engage them in an activity, such as playing with their favorite toy, you will get more natural expressions and fewer posed-looking shots. Don't be afraid to bribe them with treats either, such as a slice of apple, to get them to slow down just a bit.

Once you're back on the computer, select a few of your favorite images to refine. Use the cropping tool to select the most interesting aspects of the image and discard the rest. I recommend you copy the image (using the Save As command) before resizing it, just so you have the original handy if you want to crop it another way later on.

Now, make your print or send it as an attachment to show others how utterly beautiful, brilliant, and charming your kids are.

Saturday, March 1, 2008

Pantyhose Diffusion Filter for Flattering Portraits

Razor-sharp optics are great—unless, that is, you're photographing the love of your life. In those instances, you might want to borrow her pantyhose.

A flattering portrait is often praised for its soft lighting, good angle, and natural expression. You'll rarely hear a subject rave about a picture that highlights her pores, wrinkles, and blemishes. Sometimes, modern camera lenses can be too sharp!

A popular solution used by pros is what's known as a softening or diffusion filter. Simply put, these accessories attach to the front of the camera lens and downplay the appearance of texture on the face. The wrinkles don't go away; you simply don't notice them as much.

These specialized filters can cost as much as US$200 and are difficult to find for less than US$20. Plus, if you use a variety of lenses for your portrait photography, you might have to buy more than one filter to fit the different lens diameters. That's fine if you shoot portraits for a living. But what if you just want to take a nice shot of your sweetie?

Ask her for her pantyhose.

That's right, by stretching a piece of light beige pantyhose over the front of your lens and securing it with a strong rubber band, you can create the same flattering effect achieved in professional portraits. The more tightly you stretch the material, the milder the effect—the looser the material, the softer the image.

You can capture good portraits without filtration, as shown in picture 1, if you use good technique. But there will be situations in which you'll want to use a pantyhose filter to add a little softening effect, as shown in picture 2, Be sure to keep a knee-high stocking, along with a couple sturdy rubber bands, in your camera bag for just these occasions.

a portrait without a softening filter
Photobucket

A portrait using a pantyhose filter
Photobucket


I actually prefer knee-highs to pantyhose, because I don't have to cut the material. One knee-high fits nicely in my accessory pouch. And it doesn't run or unravel, because I haven't had to trim it.

For best results with this technique, I recommend the following camera setup:

  • Use a mild telephoto lens, such as 85mm or larger. On a point-and-shoot camera, extend the zoom lens all the way out to the telephoto setting.

  • Set the camera to Portrait mode. This opens up the aperture to help produce a softer background. If your camera doesn't have a Portrait mode, switch to Aperture Priority and set the f-stop at its widest setting, such as f-2.8 or f-3.5.

  • Position the subject at least 10 feet from a background that has few distracting elements. A big green bush, wood fence, or even the side of a house works well.

  • Look for diffused lighting, such as an overcast day. If the sun is too harsh, you can also place the subject in the shade of a tree and use the fill flash. The best lighting is usually before 10 a.m. or after 4 p.m.

  • Take lots of shots using different tension levels of pantyhose stretched over the front of the lens. You won't be able to pick your favorite by looking at the image on the camera's LCD monitor. Having lots of pictures to choose from once they've been uploaded to the computer will ensure success.

If you don't get results you like with one pair of pantyhose, try another with a different weave or thread count. You'll be amazed by the results.

Sunday, February 17, 2008

Stay in Charge of Your Batteries


The Achilles heel of digital cameras is that they need power—lots of it. But what do you do when you're in the middle of nowhere and you want to keep shooting?

I'm going to start out by saying that you should always have an extra battery on hand. Digital cameras are power-hungry beasts that behave only as long as you feed their insatiable appetite for electricity. Once the juice runs out, they're about as useful as the box they came in.

When you're traveling, be sure to take your charger and extra battery with you. Each night, put the battery you've been using all day in the charger and put the spare in the camera. Then, when you take off the next morning, pull the freshly charged battery out of the charger and put it in your camera bag. Continue this rotation throughout the trip.

If you have a particularly demanding shooting day, that extra battery will be as welcome as the Calvary when the first one fails. Just remember to charge both once you return to the room.

  • Car Chargers for Road Trips

The previous routine should work great for 90% of your travels. But what do you do on extended road trips and hikes in the backcountry, when an electrical outlet isn't right there beside your bed at night? You could take enough extra batteries to last the entire trip. If you figure one cell a day, you're probably safe, with a little discipline. My problem is that I always want to review my images at night, and that uses battery power. So I find that the one-cell-a-day regimen is a little stringent for my diet. Not to mention that most rechargeable Lithium batteries cost US$50 or more each.

Car travelers have a great alternative. Almost every camera manufacturer makes a cigarette-lighter attachment for their chargers. Your charge-and-use routine is a little different when using these tools. Instead of recharging at night, while you sleep, you charge up during the day, while you're driving. The trick to car chargers is to use them while the engine is running; otherwise, you'll drain your car battery. Running out of juice for your camera is one thing, but a dead car battery is a whole new level of distress.

Once you get your routine down, you can span the entire country with just two camera batteries and your car charger. If, for some reason, your camera doesn't have an optional car-charger accessory, all is not lost. Every electronics store carries DC to AC inverters that will also do the trick. You plug the inverter into your cigarette-lighter socket and plug your regular battery charger into the inverter. Yes, this system is a tad more bulky than the dedicated car charger, but it works just as well.

  • Solar Chargers in the Middle of Nowhere

If you plan on spending some extended quality time with Mother Nature, you'll discover that it's much easier to recharge your mind, body, and soul than it is to recharge your digicam. This is the most challenging scenario.

Solar cells have become more efficient and definitely more portable in recent years. One impressive example, the Brunton Solarroll 14, rolls up to a 12" 3" cylinder for easy travel. It weights only 17 ounces but produces 14 watts of power. When it's time to charge your camera battery, just roll out the mat, attach your battery charger to the solar cell, and put Mother Nature to work for you. Solar power might be free, but the Solarroll isn't cheap. It costs about US$399.

Certainly, there are cheaper alternatives that you can construct yourself. Solar World (http://www.solarworld.com) is a great resource for build-your-own solar projects. They carry a variety of modules that you can custom-configure for your needs. Just make sure you have enough cells to recharge your camera battery in a six-hour period. Otherwise, you might not be able to keep up with your camera's appetite for power.

For every power challenge you might encounter on the road, there's a solution. The key to success is planning ahead and gathering the right equipment so that you and your camera can stay charged and shooting for the duration of the trip.

Saturday, February 16, 2008

Double-Strapping on the Trail


Tired of your camera bouncing around during your hike? Strap it into place, for comfort and for fast access.

Here's the hiking photographer's dilemma: do you stash your camera in the backpack so that it doesn't bounce around and possibly get damaged, or do you leave it around your neck so that you're ready for the next shot, no matter how uncomfortable it is?

I can tell you right now that I'm a big fan of finding ways to keep your camera handy. Great outdoor shots present themselves with little warning, and they are usually gone within seconds. Your camera might be safe and sound in your backpack, but it also won't have nearly as many exciting pictures on it. You might miss the shot of a lifetime!

That said, my gosh, it's aggravating to have a camera swinging every which way as you try to navigate the up-and-down terrain of trail hiking. I've even encountered situations, such as crossing a stream on a log, when my swinging camera just about threw me off balance. Falling in the stream is not good for one's morale, nor is it healthy for the life of your digital camera.

If you've followed the evolution of outdoor and backpacking equipment, you know that things are pretty high-tech in that world too. Flashlights have multiple LEDs for illumination, camp stoves are feather-light and burn with welding-torch-like intensity, and the array of straps and pouches available provide lots of options for toting your gear. The shooter's belt by Cameras Up (http://www.camerasup.com), is perfect for photographers on the go.

One of my favorite setups involves using one Op/Tech USA (http://www.optechusa.com) strap around my neck and adding a second stabilizer strap around my midsection. This arrangement holds the camera snugly against my body, while providing quick access when a shot presents itself.

I prefer the Op/Tech stabilizer strap because it is made out of a rugged neoprene material that acts as a shock absorber as you move about. The camera actually feels lighter than it does with other types of straps. Plus, the Op/Tech strap has quick-release buckles that enable you to detach the camera from the strap at a moment's notice.

Op/Tech also makes a Bino/Cam Harness that enables you to slide the camera up and down the straps without actually having to detach it—very nifty.

You can create your own strapping system with basic nylon straps and buckles purchased from any camping store. Just remember to get quick-release buckles so that you're not fumbling with your straps when Big Foot goes strolling by.

Wednesday, February 13, 2008

T-Mounts and Other Threaded Tricks


Digital SLR users can connect their camera bodies to a variety of bargain optical attachments by using one of the most enduring adapters of all: the T-mount.

The best camera for photographer-hackers is certainly the digital SLR (DSLR). From outward appearances, these cameras look just like the 35mm single lens reflex (SLR) models that photographers have been using for decades. SLRs are distinguished by the ability to remove the lens from the body and replace it with another type, which makes them extremely versatile. The other advantage is that you view the picture through the same lens you use to take the photo, so what you see is what you get. DSLRs work the same way. The only difference is that they have an image sensor instead of film.

DSLRs are a lot of fun for hackers, because when you remove the lens, you can attach just about any optical accessory to the camera body, including microscopes, telescopes, slide copiers, and much more.

At first, you might hold the microscope in one hand and the camera body in the other and wonder how the heck these two items can work with each other. Generally, this happens via some type of adapter. For example, telescopes have an adapter that replaces the eyepiece, and you attach your camera to the adapter. The same goes for microscopes and other optical goodies.

But you still need a way to connect your camera to the adapter. If you don't want to shell out the big bucks for a custom adapter made by your camera manufacturer, you can make this connection by using a common photographic tool called a T-mount.

T-mounts are simple devices, really nothing more than a thick metal ring. On one side, there's a bayonet-styled mount (like the one on the base of your camera lens) that attaches the ring to your camera body. Inside the ring, you'll notice there are threads. These are a standard size that most adapters in the universe screw into snugly.

So, all you have to do is screw the optical adapter (as for a telescope) into the T-mount, tighten it, and then attach the unit to your camera body. You're in business! Now, your camera will mount on whatever optical lens the adapter is designed for.

It's a good idea to find a T-mount that works with your digital camera. Once you do, just about any optical adapter you find in the bargain bin will now mount on your state-of-the-art camera. For example, my slide copier is over 20 years old, but it works great on my state-of-the-art DSLR because I have a T-mount to hook the two together.

  • Adapters Made by Scope Manufacturers

Many spotting-scope and telescope manufacturers provide camera adapters for their products. For example, Kowa (http://www.kowascope.com) makes a photo and video adapter (TSN-VA1); you simply slide the camera lens into the adapter, tighten the mounting screw, and connect it to a Kowa spotting scope. If your camera has a filter ring, Kowa's TSN-DA1 adapter will screw into it.

Many other scope manufactures make similar adapters. If you plan on buying a telescope or spotting scope, be sure to check the accessory line for camera adapters.

  • The Simple Reversing Ring

T-mounts have a first cousin called the reversing ring. A reversing ring looks similar a to T-mount, but instead of having internal threads to attach a variety of optical accessories, it has external threads that screw into the filter ring on the front of your lens. This enables you to literally reverse your lens so that the front optic is mounted to the camera and the back optic is pointed out to the world.

Why the heck would you want to do such a thing? Well, when you turn your lens around, you increase its magnification. So suddenly, thanks to this little round piece of metal, you can get closer to your subjects for some serious macro photography.

Some camera makers, such as Nikon, make special reversing rings for their electronic cameras, with delicate contacts near the lens mount. Make sure you get a reversing ring that's suitable for your camera; otherwise, you might damage its electronics.

  • Extension Tubes

If you don't like the idea of having your lens turned around, there's another economical way to increase magnification for close-up photography. Extension tubes are "spacers" in different widths that go between your camera lens and its body. The more you increase the distance, the higher your magnification will be. Kenko makes automatic extension tubes for a variety of camera models that are readily available at many retail camera stores.

Extension tubes have the advantage of retaining some or all of the camera's functionality, such as adjusting the aperture, because they have the same contacts as your lens. Reversing rings don't provide that functionality.

The major drawback of extension tubes is that the farther you move the lens away from the camera body, the darker the image becomes, and the more light you need for a good exposure. When using tubes in low light, it can be hard to focus on your subject.

Most people invest in DSLRs so that they can change lenses more easily. But the less obvious advantage is that, by using a few of these simple adapters, you can mount your camera to just about anything with a lens. And that opens up a whole new world of photography.

Monday, February 11, 2008

Convert Your Digicam to a Digital SLR


Shading the LCD monitor for easier viewing during replay is one thing, but why not go all the way and use the monitor as a virtual SLR viewfinder for shooting images too?

Shading your LCD monitor makes viewing the picture in bright sunlight much more enjoyable. But with a little refinement, you can adapt this technique for taking pictures too, creating a virtual digital SLR.

One of the major attractions of single lens reflex (SLR) cameras is that you see the picture through the same lens that records the image. It's WYSIWYG ("what you see is what you get") photography. In contrast to SLRs, most compact digital cameras provide one lens for taking the picture and another (often referred to as the optical viewfinder) for viewing the image.

One of the problems with optical viewfinders is that they're offset from the picture-taking lens, so the composition you're looking at isn't the same one the camera is going to record. This setup is called parallax, and the closer you get to the subject the more pronounced the effect will be. The other common problem with most digicams' optical viewfinders is that they're just not very good. You don't get a full view of the subject, and what you do get isn't that great.

You do have another option: you can look through your digicam's LCD monitor when you take the picture. This has created a whole new look in photography: the arm's-length shooting pose. Photographers everywhere are holding their digital cameras out from their body to align what's on the screen. Not only is this pose awkward at times, it's also not good photographic technique, because it's harder to steady the camera during exposure at arm's length. Beyond that, some people have a hard time keeping a straight horizon line when holding an LCD this way. Something seems to get lost in translation.

When visiting the Hoodman (http://www.hoodmanusa.com) booth at the Photo Marketing Association show in Las Vegas, I discovered a great solution to all of these problems. Hoodman has designed a special monitor hood, called the Digital Camera Hood, that straps onto just about any model with a 1.8-inch or smaller LCD screen.

The open end fits around the outside of your LCD monitor, and the other end holds a 2x magnifying eyepiece. The Digital Camera Hood attaches easily in just a few seconds. When not in use, it folds up compactly, taking up little space in your camera bag.

To use the Digital Camera Hood, just attach it to the camera, turn on your camera, and view the picture through its eyepiece. Your simple digicam has just been upgraded to a virtual digital SLR with electronic viewfinder.

You can use this rig in any lighting condition. You can both shoot and review your images with it, and you can now hold the camera normally, enabling you to take sharper pictures because you're holding the camera more steadily. As a bonus, the increased magnification of the LCD monitor makes it easier to determine picture quality before you take the shot. This is a great time-saver, because you don't have to stop and review the image you just recorded (using the camera's magnification function) to see if you got the shot you wanted.

You might not want to use the Digital Camera Hood when you're on the go, toting your digicam in your pocket. But when you're engaged in serious shooting, close-up work, landscapes, and anything with a tripod, I think you'll find that this setup is a good way to improve your pictures.

Sunday, February 10, 2008

Battle the Sun with an LCD Hood


Your camera's LCD viewing screen is one of its most exciting features—except, that is, when you're standing in bright sunlight and can't see the pictures on it.

If you ask people what they like best about their digital camera, many will say it's the LCD viewing screen that provides instant gratification right after you take the shot. How could you not love it? You can review the image, analyze its pros and cons, and then either keep it or try again—instant gratification at its best.

Too often, though, this love affair comes to a screeching halt when you're working in bright, direct sun. Your once color-rich LCD fades to a nearly indistinguishable shell of its former greatness. What happened?

The sun happened. Many LCD monitors hate the sun and don't fare well in its presence. To combat this problem, you have two options. You could purchase a state-of-the-art digital camera, such as the Contax SL300R T* , that uses a new technology called DayFine to preserve the screen's color fidelity regardless of the ambient light. Contax's parent company, Kyocera, originally developed this screen for their smart phones, which are constantly used in these types of lighting conditions.

If you're not in the mood to go out and buy a new digicam, you have to find a way to shield your existing LCD monitor from the sun's blinding rays. Hoodman (http://www.hoodmanusa.com) has excelled at providing glare relief for digicam owners. They make a variety of custom hoods that attach to almost every digital camera LCD on the market. The nylon hoods are well made and most sell for US$15 to $20. They fold up and take up hardly any room in your camera bag.

You might also want to take a look at the offerings from Screen-Shade (http://www.screenshade.com). They offer LCD shades for digital cameras, camcorders, and laptops. Their camera shades run between US$20 and $40, depending on size and whether a glass magnifier is included.

A clever homemade solution for photographers who have magnifying loupes to view their film transparencies is to adapt the magnifier to mount on the LCD screen. Models such as the Peak 2038 4X and the Horizon 4X, which have a two-inch viewing base for looking at medium-format film, can also be used as a nifty LCD viewer. You want to make sure you use the opaque base so that no stray light comes in, and stay away from loupes stronger than 4x, as that's just too much magnification for your LCD monitor.

If you want, you can attach the loupe to the camera by cutting strips of adhesive-backed Velcro and adhering them the base of the loupe and the body of the camera. That way, you can easily remove the magnifier when it isn't needed. Not only does this rig provide you with sun relief so that you can actually see the picture you just took, it also makes it easier to inspect the fine details of the image.

Another trick is to take a plastic slide box, drill a hole in the bottom about the size of a U.S. quarter, and then use the Velcro strips to attach the open side of the box to the camera. If possible, use a black box to block out the light better. The main drawback of this solution is that it doesn't fold up like commercially made shades.

No matter which route you take, they're all better than cupping your hand around the LCD while squinting and trying to discern the picture you just took.

Friday, February 8, 2008

Bubble Levels to Keep Things Straight


Many digital photographers have a difficult time keeping their horizons straight while peering into their digicam's LCD monitor. Here's how to straighten things up.

For some reason, it's more difficult to compose a straight horizon line with a digital camera's LCD monitor than with a traditional SLR viewfinder. You could use the optical viewfinder that's included with most digital cameras, but the problem is that many of them show only about 85% of the actual area that's being photographed. Plus, quite honestly, they're not that accurate.

Regardless of how you frame your shots, LCD or optical, a bubble level attached to your camera can really help straighten things out. Bubble levels are helpful for composing architecture, landscapes, panoramas, and anything else that needs a straight horizontal line.

At various online retailers, you can buy bubble levels designed specifically for cameras. For example, the Hama Double-Bubble Level is a precision instrument that slides into the hot shoe atop your camera, enabling you to level it on two axes. The only downside is that these accessories are relatively expensive. The Hama level, for example, runs about US$30.

If you have more time than money, you can make your own bubble level. Hardware stores carry pocket bubble levels, often for US$3 or less. Find one that looks suitable for your camera. If your model has a hot shoe, all you have to do is find a spare shoe that will slide into it. This is one reason why I have a box of old equipment that includes broken cameras, dead flashes, and orphaned straps. If you have an old flash or any accessory that was designed to fit in your camera's hot shoe, you can detach the foot and attach it to your bubble level with a spot of glue. The trick here is to make sure the foot and the level are flush against each other when you glue them. Otherwise, your homemade device might not be accurate when you attach it to the camera.

If your camera doesn't have a hot shoe, just get a level with a flat bottom and set it on top of your camera. As long as the level rests flush against the camera's surface, you're in business.

To use the bubble level, simply mount your camera on a tripod and attach the level. Adjust the tripod until the bubble is centered, as shown in, and the resulting picture should be nice and square. This is particularly helpful when shooting multiframe panoramas.

Regardless of whether you buy a professional photographer's bubble level or make your own, you'll find that it will help you overcome crooked horizons and leaning buildings. Just like the carpenter says: measure twice and shoot once.

Monday, February 4, 2008

A Flexible Arm to Hold Accessories


How many times have you wished for an extra hand when you're shooting? Here's one you can attach to your camera's hot shoe or tripod socket.

When you're shooting without a tripod, it's best to have both hands on the camera to keep it steady and record sharp images. But sometimes you need to shade the lens from the sun or hold a small item while you photograph it. An extra hand would be invaluable at those times.

The folks at GranView Camera have invented a unique accessory called the Flare Buster (http://www.multiclip.com) that might turn out to be one of the most versatile tools in your camera bag. This ingenious item is simply a flexible arm that's 15 inches long with a camera mount on one end and a sturdy clip on the other. You can attach it to your camera via the tripod socket or the hot shoe. Then, use the clip on the other end to hold whatever it is you need held.

The Flare Buster kit comes with a card that can serve as a shade against the sun, two vignettes that are handy for portraits because they soften the edges of the frame around the subject, and a couple of reflectors.

Now, the fun begins. If you need a simple lens shade, put the supplied card in the clip and position it so that it protects the front of your lens from the glare of the sun. The flexible arm moves easily but stays firmly in position. For cameras that don't accept filters, simply attach the filter to the clip and position it in front of your lens. Who needs filter screw threads when you have a Flare Buster?

Digital cameras have amazing close-up focusing ability. Usually, the hardest part is correctly positioning the item you're photographing. Why not attach the item to the Flare Buster and position it any way you want, as illustrated in? You don't even need a tripod; because the item is now connected to the camera, they move in unison.

For a super-soft background when shooting close-ups with the Flare Buster, try moving the camera from left to right during the exposure. This is called panning, and you can get some evocative effects with it.

Or, for close-up subjects that are fine where they are, such as a flower in the ground, attach one of the reflectors to the clip and use the flexible arm to reflect a little fill light to your close-up photography by bouncing light back onto the subject.

Flare Buster kits range from US$30 to $36 depending on the configuration. They are well made and fit easily in your camera bag. You'll always have that extra hand available to make photography just a little bit easier.

Sunday, February 3, 2008

Flash Brackets for Pro Lighting


If your camera accepts an external flash, you might think that will solve your problems with red eye. Well, almost.

Many prosumer digital cameras provide a means for attaching an external flash. More often than not, the connection is provided by what is commonly called a hot shoe: a postage-stamp-sized bracket on top of the camera into which you can slide an external flash.

Photographers usually think that purchasing an optional flash unit and attaching it to the hot shoe will make their red-eye problems magically disappear. Indeed, an external flash does help reduce red eye. But sometimes merely sliding a flash into the hot shoe doesn't get rid of the problem altogether.

The best way to ensure that you'll never have red eye again is to use a special bracket to move your external flash even farther away from the camera. You'll also need a dedicated flash cord (made by the camera manufacturer) that allows the flash to communicate with the camera as if it were still mounted in the hot shoe. Typically, these special flash cords cost between US$35 and $50.

As for the flash bracket itself, I think the best commercial one is the Stroboframe Quick Flip 350 (catalog #310-635) distributed by Tiffen (http://www.saundersphoto.com). The Quick Flip is easy to use. You mount your camera to the base of the bracket by turning the screw into the camera's tripod socket. You then put one end of the dedicated flash cord into the camera's hot shoe and attach the other end to the top of the bracket. Now all you have to do is attach the flash to the cord on top of the bracket, and you're in business

Depending on the height of your camera, the flash is now positioned six to eight inches higher than it was previously in the camera's hot shoe. Not only does this configuration eliminate red eye completely, it also serves the dual purpose of lowering those unsightly shadows cast on walls directly behind the subject. By raising the flash, you thereby lower the shadows out of the frame of view.

This Stroboframe model is called Quick Flip because it solves another problem. Normally, when the flash is mounted directly to the camera, the flash is above the lens (where it should be) for horizontal shots. But when you turn the camera to the vertical position, the flash is now off to the side, which once again produces those ugly shadows.

However, the top part of the bracket on the Stroboframe actually flips. When you turn the camera to the vertical position, you can flip the frame too, keeping the flash directly over the lens instead of alongside it. This is a great feature.

Stroboframes cost about US$50 at your local camera store or online retailer, such as B&H (http://www.bhphoto.com). I've used one for years at countless wedding receptions and parties, and it works just as well today as it did the day I bought it. I can use the bracket for all of my 35mm cameras, as well as with any digicam I own.

You'll really look like a pro when you use the Stroboframe. More importantly, your pictures will too.

Saturday, February 2, 2008

Attach Your Camera to Bicycle Handlebars

Put your pictures in motion by attaching your digicam to the handlebars of your bike.

Some people might wonder why the heck anyone would want to attach their digital camera to the handlebars of their bike. Well, in the old days of traditional photography, this didn't make much sense. You couldn't see through the viewfinder while pedaling, so composition was little more than a wild guess.

But many of today's digicams have variable-angle LCD monitors. This means that you can pull the monitor out from the back of the camera and adjust it to your viewing angle. This is a perfect example of how one technology (digital still photography), can be borrowed from another (digital video). Digital video camcorders have used swiveling LCDs from the get-go.

For cycling fans, this means that you can mount your camera on the handlebars, swing the screen upward, and monitor your composition in real time while you're peddling; just don't forget to watch the road, please! This is a great opportunity for you to share your adventures with those who don't ride with you.

If your camera has one of these nifty swiveling monitors, then chances are good that it also has a remote release that you can hold in one hand while riding. Most of these releases not only enable you to trip the shutter, but they also have buttons to let you zoom the lens to different focal lengths. You can literally compose and shoot while on the ride.

If you really want to get creative, enable the Movie mode on your camera and take short video clips of your travels. Try to find a smooth surface while recording video so that the movie isn't too choppy.

A clever way to make all this happen is to get an UltraClamp (US$29.95) and UltraMount (US$10.95) by Pedco, and secure the entire rig to your bicycle. Pedco's products, including the fantastic UltraPod, are distributed by BKAphoto.com (http://www.bkaphoto.com). The store finder on their site can help you find the closest retail outlet.

Once your digicam is mounted, choose still pictures or movies and fire that shutter. You will get images unlike any others that you normally shoot. Just remember to be safe while you're doing so.

Monday, January 28, 2008

Steady Shots from the Comfort of Your Car


Not everyone is John Muir, roaming the wilds with just a walking stick and a broad-rimmed hat. Some folks would rather shoot without leaving the comfort of their automobile.

Sometimes, you're not allowed out of your car, such as when you're visiting certain wild game preserves or protected wildlife areas. Other times, you can use your vehicle as a duck blind of sorts. Animals seem less concerned about people when they are safely strapped inside an automobile. And then there are those days when you just don't feel like taking a hike.

Regardless of the situation, you want sharp images from your day's outing. And the best way to keep things nice and crisp is to steady the camera during exposure. But in a car, that's easier said than done. It's not like you can set up your tripod on the front seat.

But what you can do is use the car itself as a stabilizer. Roll down the window about 2/3 of the way and attach a Bogen Car Window Pod (catalog #3292) with a Junior Tripod Style Head (catalog #3407). You can find out more about these at http://www.bogenimaging.com. The combination sells for about US$85, and they are well made and extremely sturdy.

If $85 is a little more serious than you care to get for your front-seat shooting, take a look at Pedco's UltraClamp (US$29.95) with UltraMount (US$10.95). If you really need to go on the cheap, try the Pillow Pod Beanbag, available for about US$6 from Porter's Camera Store (http://www.porterscamerastore.com). Photo beanbags are great accessories to keep in the trunk because you can use them in so many situations. The bag conforms to the surface on which its placed, providing a steady support for your camera while protecting it from the surface itself. You can plop it over the edge of a car window, on a tree limb, or even on the ledge of a balcony, and it will help you take sharper shots.

Here's one word of advice: be sure to keep the camera strap around your neck when you place your expensive investment on the edge of anything. One false move and both camera and beanbag might go tumbling to their doom. You'll get over the loss of the beanbag pretty quickly. Recovering from a shattered camera might take a little longer.

Thursday, January 24, 2008

Walking-Stick Mount


A trusty walking stick is helpful for fording streams and navigating slippery trails. But why not use it to steady your camera, as well as your footing?

In the wide world of walking sticks, there are basically two types: the ones you buy and the ones you make. Either version can become a steadying friend for your outdoor photography.

A trip to the mountaineering store reveals that today's walking sticks—or trekking poles as those in the know call them—are lightweight, sturdy, and have comfortable grips. Most are constructed in collapsible sections, enabling the stick to fit nicely in a suitcase or be lashed onto the outside of your backpack. Most trekking poles have a rubber tip that provides good traction on paved walkways and a metal tip for digging into the side of hills.

Leki (http://www.leki.com) is a popular supplier of trekking poles that range from US$50 to over US$100. Outdoor photographers should take a look at the Sierra Antishock (model TK2091-04), which has a removable wooden knob that exposes a camera mount.

By attaching your camera to the walking stick, you can create the third leg of what I call the human tripod. You supply your two legs, and the walking stick becomes the third. Simply position your feet about shoulder's width apart, and then lean forward slightly on the walking stick while composing your picture in the camera's viewfinder. You'll find that this method is much easier for stabilizing the camera than trying to hold it with just your two hands.

If you'd rather not spend the money on a Leki stick, you can make your own. First, make a quick trip to the hardware store for a 1/4" screw with 20 threads per inch. Get one about an inch or so long. Screw it into the tripod socket on the bottom of your camera. I recommend that you add a plastic washer to serve as a cushion between your camera and the walking stick. Slip the spacer on the screw and position it so that it's flush against the bottom of the camera. With a felt-tip pen, mark the screw right beneath the washer, and then remove both pieces from the camera.

Drill a hole that's slightly smaller in diameter than the 1/4" screw in the top of your walking stick, and then twist the screw into the hole so that the mark you made is just below the top surface. Be careful not to damage the threads while doing this.

Now, slip the plastic washer onto the post. It will serve as a cushion. Attach your walking stick to the tripod socket in the bottom of the camera. Do this with care the first time to ensure that you measured correctly, and don't damage the bottom of the camera by screwing the post too deep into the socket. If you miscalculated, sink the post further into the walking stick and try again. The post should fit snugly in the camera socket, but it shouldn't go too deep.

If you want to add a crowning touch, add a decorative knob to the top of the stick to cover the post when the camera isn't attached. You can drill a hole in the knob and sink in a 1/4" nut so that the knob easily screws on and off.

Regardless of whether you go the homemade route or opt for the slick Leki model, a walking stick that doubles as a camera stabilizer can help you take sharper pictures when you're in the great outdoors.

Tuesday, January 22, 2008

Travel Tripod: A Happy Compromise


When tabletop supports are just too small, but you can't afford to pack a full-size tripod, you might want to consider a travel model that folds flat and fits in the smallest of suitcases.

On my last trip to Europe, I knew that I wanted to photograph landscapes and other subjects that would require a tripod. But I needed to travel light, because I was taking only a midsize duffle and my camera bag to store all of my belongings. A key piece of equipment for this adventure turned out to be a unique travel tripod called the Magic 2, made by Cullmann.

Unlike other tripods that have a large circumference even when collapsed, the Cullmann's legs fold flat, forming a compact rectangle that is only 1.5 inches thick and 13.75 inches long. It fits almost anywhere. And even though it's constructed of anodized metal for durability, the Magic 2 weighs only 2.5 pounds.

You can extend this marvel of engineering to 57 inches, but I don't recommend it. Instead, resist extending the center post to maximum height and keep the tripod to about 50 inches for better stability. I also recommend you hang your camera bag over one of the legs or around the center post for a more stable shooting surface.

One of the reasons this unit is called Magic is that it also converts to a better-than-decent monopod. That's right, one of the legs detaches from the main unit and screws into the center post to create a walking stick with a ball-head mount on top. This is really nice for day hikes when you want to leave the rest of the unit back in the hotel room.

In online reviews, some photographers have remarked that the tripod legs don't spread wide enough to provide adequate stability on uneven surfaces. I agree. I had to be careful where I set up the Magic 2 and had
to remember to stabilize it with my camera bag.

The legs extend to full height via four collapsible sections. They twist one way to loosen and the other to tighten, which works well most of the time. An important tip to remember is not to tighten the legs when you collapse the tripod. You'll have a hard time getting a good grip to loosen them later. I think it's a law of nature that tripod legs get tighter on their own over time. Keep them loose except when extended.

The ball-head tripod mount that comes with the Magic 2 enables you to position the camera at just about any angle. It even has a quick-release plate, so you can easily detach and reattach the camera.

You can purchase the Cullmann Magic 2 from most photo retailers, including http://www.adorama.com or http://www.bhphoto.com, for about US$115. It's quite effective for most of today's digicams. Even though it's not perfect, I've recorded many fine images with it that I would have otherwise missed.

Monday, January 21, 2008

Pocket Tripods on the Go


Yes, your full-size tripod is important, but when you want to travel light, a pocket tripod is great for getting into your own group shots and capturing twilight landscapes.

For so many creative endeavors, you need a way to stabilize your camera; it comes with pushing the limits of photography. Every serious photographer needs to have a full-size tripod. But beyond that, a variety of smaller stabilizing devices can help you cope with various shooting situations. At the top of this list is the pocket tripod.

Before I get into the equipment itself, I want to review why tripods contribute so much to image sharpness. They help prevent camera shake: soft, fuzzy images that result from not holding the camera steady during exposure.

When you want to photograph a subject without a flash in low ambient light—such as when you're indoors, or during dusk or early morning hours—your camera chooses a long shutter speed. When I say long, I mean 1/8, 1/4, 1/2 of a second, or longer. Now, those times probably sound pretty fast to you. But in camera terms, they are as slow as molasses in winter. Most daylight pictures are recorded at 1/60, 1/125, 1/250 of a second, or faster.

Once your shutter slows down to 1/15 of a second or longer, you need to stabilize the camera. If you don't, the slightest movement you make during the exposure will actually cause softness in the image. In low lighting, even the act of pressing the shutter button itself can cause camera shake.

This is why tripods are necessary. Unless you're going to limit your shooting to broad daylight or flash photography, you're going to need a way to stabilize the camera. For big jobs, such as photographing a starry night, you'll need a big tripod. But for many situations, you can get by with a mini tripod that fits in your back pocket. These are important tools, because compact tripods are more likely to make the trip than their bulkier big brothers, who are often left at home.

The results of camera shake and poor focusing are different. With camera shake, the overall picture will look a tad fuzzy. When you focus poorly, something in the shot will be sharp, just not the part you wanted.

Let's look at a few pocket tripods and see what's available:


UltraPod II

Pedco (http://www.pedcopods.com) makes two sizes of their versatile UltraPod. I recommend the larger UltraPod II because it's the more stable of the two. These portable tripods include ball heads, and they fold up nicely to fit in your back pocket or camera bag. They are made from durable plastic that can handle abuse. They include a sturdy Velcro strap that enables you to secure the camera to signposts and tree limbs. This increases their usability greatly, because you don't always have to find a level surface. Most retailers sell the UltraPod II for US$29.


Sony VCT-TK1 Compact Pocket Tripod

This Sony camera support doesn't look like your normal tripod. It is extremely portable because it folds flat, but it's better designed for tabletops and other flat surfaces. It sells for only US$15 from retailers such as MainSeek.com (http://camera.mainseek.com).


Quantaray QT-75 Mini Tabletop Tripod

Quantaray's offering has three legs that spread a pretty good distance, providing stable support on flat surfaces. The screw-mount head allows for both vertical and horizontal tilting. This mount isn't as versatile as a ball head, but it's easier to level the camera quickly, increasing your odds for a straight horizon line. The QT-75 is available from retailers such as Digital Cameras4All (http://www.digital-cameras4all.com) for about US$15.

Regardless of which tripod you use, keep in mind that it's best to trip the camera's shutter by using the self-timer or the remote release. That way, you won't jar your digicam by pushing the shutter button directly.

Pocket tripods aren't perfect for every situation. But they are remarkably versatile and will enable you to capture many shots you would otherwise miss. And unlike their big brothers, they won't put a strain on your shoulder or your pocketbook.